
ridgid pipe threader manual
This manual provides a comprehensive guide to using RIDGID pipe threaders efficiently and safely․ It covers setup, operation, and maintenance for professionals and DIYers alike, ensuring precise threading results․
1․1 Overview of the RIDGID Pipe Threader
The RIDGID Pipe Threader is a portable, manually operated tool designed for threading pipes and conduits․ It is known for its durability, precision, and ease of use, making it a favorite among professionals and DIYers․ The threader supports various pipe sizes and thread forms, such as NPT and BSPT, ensuring versatility for different projects․ Its compact design allows for use in tight spaces, while its robust construction ensures long-lasting performance․
1․2 Importance of Proper Manual Usage
Proper manual usage ensures safety, efficiency, and optimal performance when using the RIDGID Pipe Threader․ Following the manual prevents damage to the tool and pipes, while also maintaining thread quality․ Correct techniques reduce the risk of accidents and extend the tool’s lifespan․ Adhering to guidelines ensures consistent results and minimizes handle force, making the threading process smoother and more reliable for professionals and DIYers alike․

Safety Precautions and Guidelines
Always wear PPE, ensure proper tool setup, and keep hands away from moving parts․ Follow manual instructions to avoid accidents and maintain safe operating conditions․
2․1 General Safety Tips for Pipe Threading
Always inspect the tool before use and ensure the work area is clear․ Secure the pipe firmly in a vise to prevent movement․ Keep hands away from rotating parts and avoid loose clothing․ Use the correct die head for the pipe size and type to maintain thread quality․ Proper alignment and consistent handle movement are crucial for safe and efficient threading․ Regular maintenance ensures optimal performance and longevity of the threader․
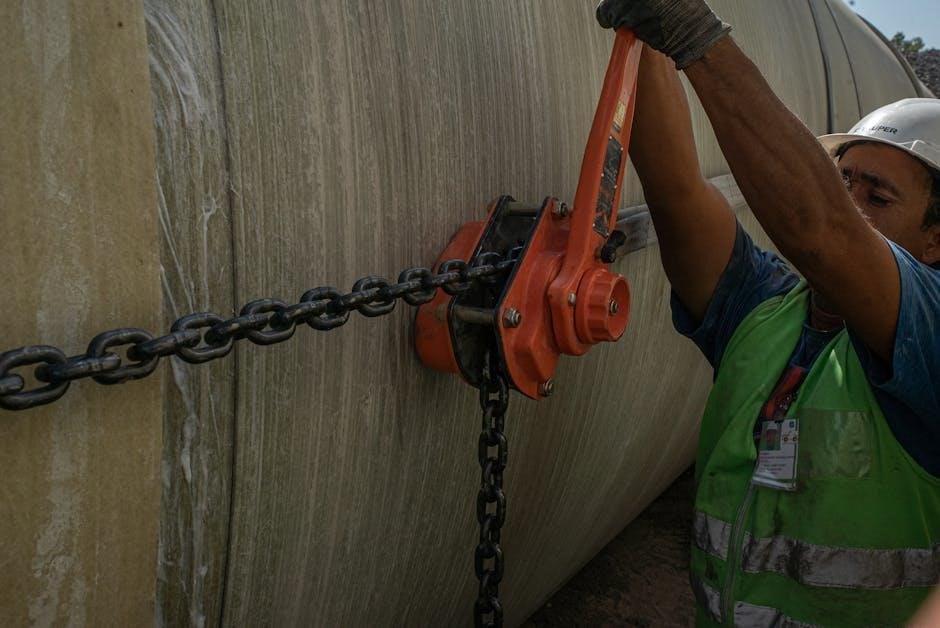
2․2 Personal Protective Equipment (PPE) Requirements
Wear safety glasses to protect eyes from debris․ Use gloves to maintain grip and prevent hand injuries․ A face mask is recommended to avoid inhaling metal shavings․ Ensure loose clothing is tied back and avoid jewelry that could catch on moving parts․ Proper PPE ensures a safe working environment and prevents accidents during the threading process․ Always adhere to safety protocols for optimal protection․
Setting Up the RIDGID Pipe Threader
Unpack and inspect the tool for damage․ Mount the pipe securely in a vise․ Select the correct die head for the pipe size and type․ Ensure proper alignment before starting the threading process․ Follow manual instructions for optimal setup and safety․
3․1 Unpacking and Initial Inspection
Begin by carefully unpacking the RIDGID pipe threader and inspecting all components for damage or wear․ Ensure all parts, including the die head, ratchet, and guide, are included and in good condition․ Check for any signs of damage, such as dents or rust, which could affect performance․ Replace any damaged parts before use to ensure safety and proper functionality․ This step is crucial for maintaining tool reliability and achieving precise threading results․
3․2 Mounting the Pipe in a Vise
Securely mount the pipe in a sturdy vise, ensuring it is centered and stable․ Use soft jaw inserts to prevent damage to the pipe surface․ Tighten the vise firmly to hold the pipe in place, ensuring it doesn’t move during threading․ Proper alignment is crucial for accurate and safe threading operations, so double-check the pipe’s position before proceeding․
3․3 Selecting the Correct Die Head
Choosing the right die head is essential for threading accuracy․ Ensure the die head matches the pipe’s size, type, and desired thread form․ Inspect the die head for wear or damage before use․ Compatibility with your RIDGID threader model is crucial for proper function․ Always consult the manual for specific die head recommendations and installation instructions to achieve optimal threading results and maintain tool performance․
Operating the RIDGID Manual Pipe Threader
Secure the pipe, apply thread cutting oil, and use the ratchet to create precise threads․ Follow the manual’s step-by-step guide for smooth, consistent results every time․
4․1 Threading Process Step-by-Step
Ensure the pipe is securely mounted in a vise․ 2․ Apply RIDGID Thread Cutting Oil to the pipe end․ 3․ Attach the selected die head to the ratchet․ 4․ Align the die head with the pipe, ensuring proper seating․ 5․ Use a pumping motion on the handle to start threading․ 6․ Maintain steady, consistent pressure throughout the process․ 7․ Inspect the threads for quality and accuracy upon completion․
4․2 Using the Ratchet and Die Head
Attach the die head to the ratchet, ensuring it is securely locked in place․ Align the die head with the pipe, making sure it is properly seated․ Use a firm, consistent pumping motion on the handle to engage the threading process․ Apply steady pressure to maintain thread quality․ For different pipe sizes, adjust the die head as needed․ Always monitor the thread progress to ensure accuracy and avoid over-threading․
4․3 Applying Thread Cutting Oil
Apply RIDGID Thread Cutting Oil to the pipe end and die head before threading․ This ensures smooth cutting, reduces friction, and prevents overheating․ Reapply oil periodically during the process to maintain lubrication․ Proper lubrication is essential for achieving clean, precise threads and extending tool life․ Insufficient oil can lead to poor thread quality and increased wear on the die head and ratchet mechanism․
Maintenance and Care of the Threader
Regular maintenance ensures optimal performance; Clean and lubricate the tool, inspect for wear, and replace parts as needed to prolong the threader’s life effectively․
5․1 Cleaning and Lubricating the Tool
Regular cleaning and lubrication are essential for maintaining the threader’s performance․ Use a soft cloth to wipe away debris and apply RIDGID Thread Cutting Oil to moving parts․ Ensure the die head and ratchet are well-lubricated before use․ After each threading operation, clean the tool thoroughly to prevent rust and wear․ Proper maintenance ensures smooth operation and extends the tool’s lifespan․ Always handle dies with care to avoid damage․
5․2 Inspecting and Replacing Worn Parts
Regularly inspect the threader for wear, especially the dies, ratchet, and guide posts․ Replace any damaged or worn components with genuine RIDGID parts to maintain performance․ Use only RIDGID replacement dies to ensure thread quality and prevent handle force issues․ Inspect the die head alignment and tighten any loose connections․ Addressing wear promptly avoids costly repairs and ensures consistent threading results․ Always refer to the RIDGID parts catalog for compatible replacements․
Common Issues and Troubleshooting
Identify and resolve issues like inconsistent thread quality or jamming by checking die alignment, ensuring proper lubrication, and verifying correct die selection for the pipe size․
6․1 Resolving Thread Quality Problems
Ensure proper thread quality by checking die alignment and lubrication․ Inspect dies for wear and replace them if necessary․ Use the correct die head for the pipe size and type․ Avoid excessive force, as it may damage the threader or pipe․ Regularly maintain the tool to prevent issues․ If threads appear uneven, adjust the die head alignment and rethread the pipe․ Proper handle movement and consistent pressure are key to achieving high-quality threads․
6․2 Addressing Jamming or Sticking Issues
If the pipe threader jams or sticks, stop immediately and inspect the dies and pipe alignment․ Ensure the die head is properly seated and aligned․ Check for sufficient thread cutting oil application․ Inspect the dies for wear or damage and replace if necessary․ Clean debris from the threader and dies․ Realign the pipe and restart the threading process slowly to avoid further issues․ Regular maintenance can help prevent jamming․
Understanding Pipe Threader Dies
Pipe threader dies are essential for creating precise threads on pipes․ They come in various types, such as NPT and BSPT, and must be selected based on pipe size and thread type․ Proper die selection ensures high-quality threading and prevents issues like jams or uneven threads․ Always use RIDGID replacement dies for optimal performance and durability․
7․1 Types of Dies and Their Uses
RIDGID pipe threader dies come in various types, including NPT (National Pipe Taper) and BSPT (British Standard Pipe Taper), each designed for specific thread forms․ Right-hand dies are standard for most applications, while left-hand dies are used for unique threading needs․ The dies are categorized by pipe size and thread type, ensuring precise fitment․ Proper die selection is crucial for achieving accurate and durable threads․ Always use genuine RIDGID replacement dies for optimal performance․
7․2 Installing and Removing Dies
Installing and removing dies requires careful attention to ensure proper alignment and avoid damage․ To install, align the die with the ratchet head, ensuring the thread type matches the die․ Gently insert and secure it firmly․ For removal, release the locking mechanism and pull the die straight out․ Always clean and inspect dies before reuse to maintain threading quality and tool performance․ Follow manufacturer guidelines for optimal results․
Compatible Models and Accessories
RIDGID pipe threaders are compatible with various models, including 65R-C and 65R-TC, and offer accessories like die heads and thread cutting oil for enhanced performance and compatibility․
8․1 Overview of RIDGID Threader Models
RIDGID offers a range of threader models, including the 65R-C and 65R-TC, designed for manual pipe threading․ These models are known for their portability, efficiency, and compatibility with various pipe sizes․ The 65R-C is a manual receding threader ideal for threading pipe or conduit, while the 65R-TC is a similar model with enhanced features․ Both are built for durability and precision, catering to professionals in plumbing, construction, and electrical fields․
8․2 Recommended Accessories for Enhanced Performance
Enhance your RIDGID pipe threader’s performance with essential accessories like high-quality dies, thread cutting oil, and durable carrying cases․ These tools ensure precise threading, reduce wear, and improve efficiency․ RIDGID offers compatible dies for various pipe sizes and types, while thread cutting oil minimizes friction and extends tool life․ A sturdy carrying case keeps your equipment organized and protected for jobsite mobility and convenience․

Best Practices for Consistent Threading
Ensure proper alignment, use the correct dies, and maintain consistent handle movement for precise threads․ Regularly clean and lubricate the tool to optimize performance and longevity․
9․1 Ensuring Proper Alignment
Proper alignment is crucial for accurate threading․ Center the pipe in the die head, ensuring it aligns with the guide marks․ Secure the pipe firmly in a vise, and verify the die head is straight․ Use alignment tools or marks on the threader to maintain consistency․ Misalignment can lead to uneven threads or damage to the tool․ Always double-check before starting the threading process for optimal results․
9․2 Maintaining Consistent Handle Movement
Maintain smooth, steady handle movement for precise threading․ Start with a consistent pressing motion, applying even pressure throughout the stroke․ Avoid jerky or uneven movements, as they can lead to poor thread quality․ Keep the handle aligned with the pipe axis to ensure straight threading․ Regularly lubricate moving parts and inspect for wear to maintain smooth operation․ Consistent handle movement ensures high-quality threads and reduces tool strain․
Mastery of the RIDGID pipe threader requires practice, adherence to safety guidelines, and proper technique․ Following this manual ensures safe, efficient, and professional threading results consistently․
10․1 Summary of Key Takeaways
The RIDGID pipe threader manual emphasizes proper setup, safe operation, and regular maintenance․ Using the right dies, applying thread cutting oil, and maintaining consistent handle movement are crucial․ Always inspect the tool and pipe before use and follow guidelines to ensure high-quality threads․ Adhering to these steps maximizes efficiency and safety, making it essential for professionals and DIYers to master these techniques for optimal results․
Leave a Reply
You must be logged in to post a comment.